Repotting a Calathea is not just about changing the pot. The real risk is what happens afterward: the roots suddenly have to adjust to a new soil mix, a different moisture rhythm, and sometimes a pot that stays wetter than expected.
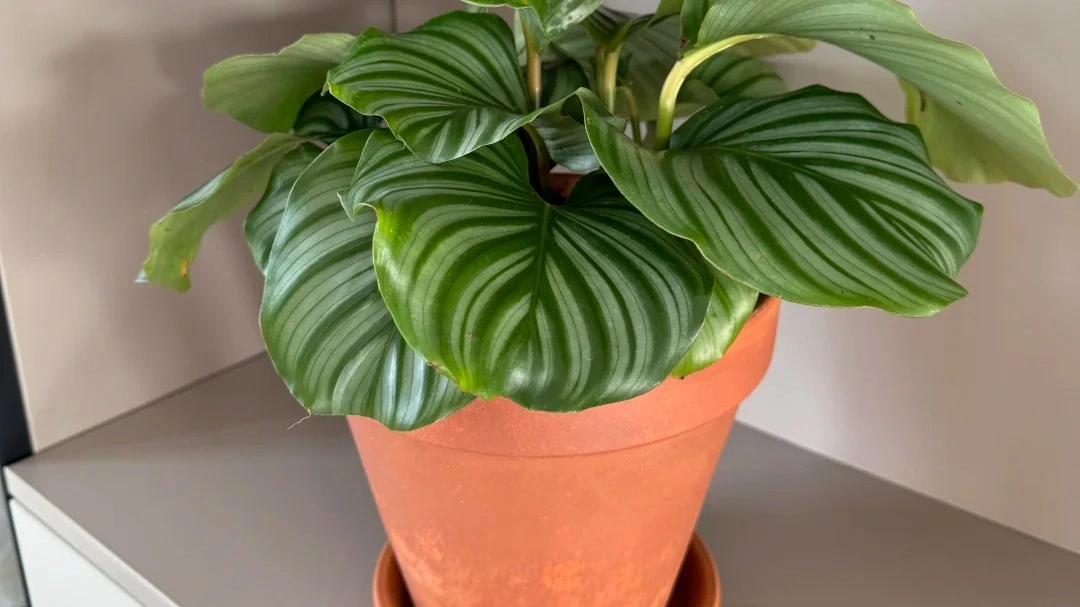
I learned this after moving one of my Calatheas from its nursery pot into a bottom-watering style pot. The plant had been growing new leaves, but the older leaves kept getting crispy edges. After improving airflow and changing the pot setup, it became much easier to manage.
This guide focuses on how to repot Calathea without creating new problems — when to repot, when to wait, what pot and soil to use, and how to avoid drooping, yellow leaves, and root stress after repotting.
Quick Answer: When Should You Repot a Calathea?
The best time to repot a Calathea is spring to early summer, when the plant has enough warmth and light to recover. I would not repot on a strict calendar, but most healthy Calatheas need it about every 1–2 years.
I repot when the soil has become compact, the roots are crowded, the pot dries unevenly, or the plant keeps struggling even though light, humidity, and watering are already reasonable.
I would not repot just because one old leaf turns yellow or one edge gets crispy. A weak or stressed Calathea can look worse after repotting, so I only do it when the root zone or soil setup is clearly part of the problem.
Signs Your Calathea Actually Needs Repotting
I look for signs that the root zone is no longer working well: compact soil, crowded roots, uneven drying, or repeated leaf stress even when the basic care seems right.
The Soil Has Become Compact
Compacted soil is one of the clearest reasons to repot. If the top layer turns hard, water sits on the surface before sinking in, or the pot stays wet for far longer than it used to, the roots may not be getting enough oxygen.
Calatheas like moisture, but they still need air around the roots. A heavy, packed mix can make the plant look overwatered even if you are not watering very often.
Roots Are Crowded or Circling
If roots are growing out of the drainage holes, or you slide the plant out and see roots circling tightly around the bottom, it may be time to move up one pot size.
But I would not repot every time I see a few roots. Calatheas do not need a huge pot. A pot that is too large can hold extra moisture and make root stress worse.
The Plant Dries or Stays Wet in a Strange Way
Uneven drying is another sign I take seriously. Sometimes the surface looks dry, but the middle of the pot is still heavy and wet. Other times, water runs down the sides without actually hydrating the root ball.
If the pot dries in patches, stays wet for too long after watering, or never seems to hydrate evenly, the issue may be the soil structure rather than your watering schedule.
New Leaves Grow, but Old Leaves Keep Crispy Edges
This was one of the signs that made me reconsider my own setup. My Calathea was still pushing new leaves, but the older leaves kept developing crispy edges. That told me the plant was growing, but the root environment was still not ideal.
Repotting helped only because I also improved airflow and changed the pot setup so moisture moved more evenly. It was not just about giving the plant more space.
When I Would Not Repot Yet
Repotting can help a Calathea, but timing matters. If the plant is already stressed, a new pot can add more shock instead of solving the real problem.
I usually would not repot during the first 1–2 weeks after bringing a Calathea home, unless the soil smells sour, stays waterlogged, or I suspect root rot. A new plant is already adjusting to different light, humidity, and watering, so I prefer to let it settle first.
I also avoid repotting in cold, low-light winter conditions. When growth is slow, the roots recover more slowly too. If I must repot in winter because the soil is failing, I keep the change as gentle as possible.
If the plant is badly dehydrated, I would rehydrate it first instead of repotting immediately. Dry, stressed roots are easier to damage when the old soil breaks apart.
If the soil is wet and the leaves are drooping, I would not jump to a bigger pot. That combination makes me check the roots, drainage, and soil smell first. A larger pot can hold even more moisture and make the problem worse.
One old yellow leaf is also not enough reason to repot. I look for a pattern: several yellowing lower leaves, slow drying soil, compact mix, stalled growth, or roots clearly running out of room.
What Pot Should You Use for Calathea?
The best pot for a Calathea is not always the prettiest one. I care more about drainage, pot size, and how evenly the mix dries after watering.
If you are still deciding between a self-watering pot, terracotta pot, or orchid pot with side holes, I break that down more clearly in my guide to the best pots for Calathea.
A Pot With Drainage Is Non-Negotiable
A Calathea pot needs drainage holes. This plant likes steady moisture, but it does not like sitting in stagnant water. If extra water cannot leave the pot, the root zone can stay wet and low in oxygen for too long.
A decorative outer pot is fine, but I still want the inner pot to drain freely. After watering, I always make sure the plant is not sitting in a pool of water inside the cover pot.
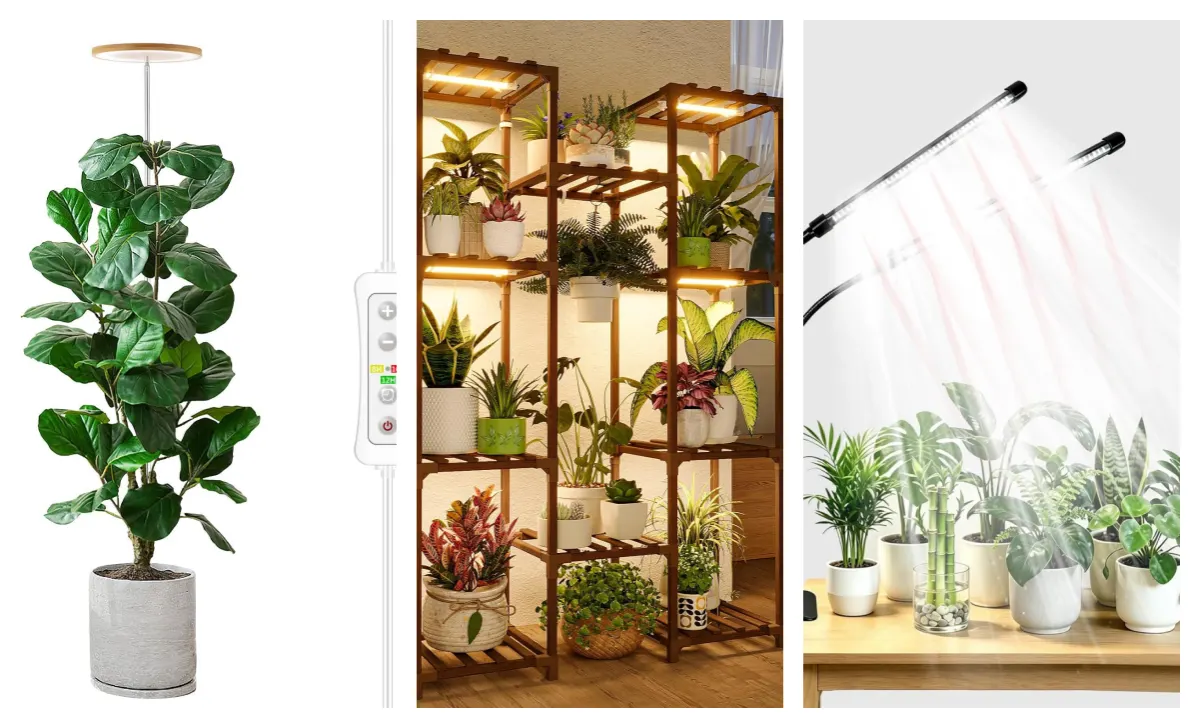
Should You Use a Self-Watering Pot?
A self-watering pot can help if you often struggle with uneven watering. It lets the mix take up moisture more gradually from below, which can make watering easier to manage.

But I would only use one with an airy mix, healthy roots, and good airflow. If the soil is dense or the plant is already stressed, a reservoir can keep the root zone too wet and make the problem worse.
Do Not Jump to a Much Bigger Pot
When repotting Calathea, I usually move up only one pot size. A much larger pot holds more soil, and that extra soil can stay wet long after the roots have taken what they need.
Calathea roots do not like being surrounded by a large amount of cold, damp mix. A slightly larger pot is enough. The goal is more room and better airflow, not a huge container that keeps the roots sitting in moisture.
The Soil Mix I Prefer for Repotting Calathea
When I repot a Calathea, I want the new mix to hold light moisture but still let air reach the roots. Repotting into dense, heavy soil can make the plant worse, even if the pot itself is better.
A simple Calathea repotting mix can include peat moss or coco coir, perlite or pumice, fine orchid bark, and a small amount of compost or worm castings. I would be careful with too much sphagnum moss because it can hold more water than beginners expect.
My basic starting point would be:
- 2 parts peat moss or coco coir
- 1 part perlite or pumice
- 1 part fine orchid bark
- a small amount of compost or worm castings
This does not need to be a perfect recipe. The goal is a mix that stays lightly moist without becoming compact, sour, or soggy. If your home is humid or your pots dry slowly, add more bark or pumice. If your home is dry or heated, keep a little more moisture-retentive base in the mix.
For a deeper breakdown of ingredients and ratios, see my full best soil for Calathea guide.
If you do not want to mix everything from scratch before repotting, I also have a separate buying guide to store-bought soil for Calathea, including ready-made mixes, perlite, pumice, bark, charcoal, and potting supplies I would actually consider.
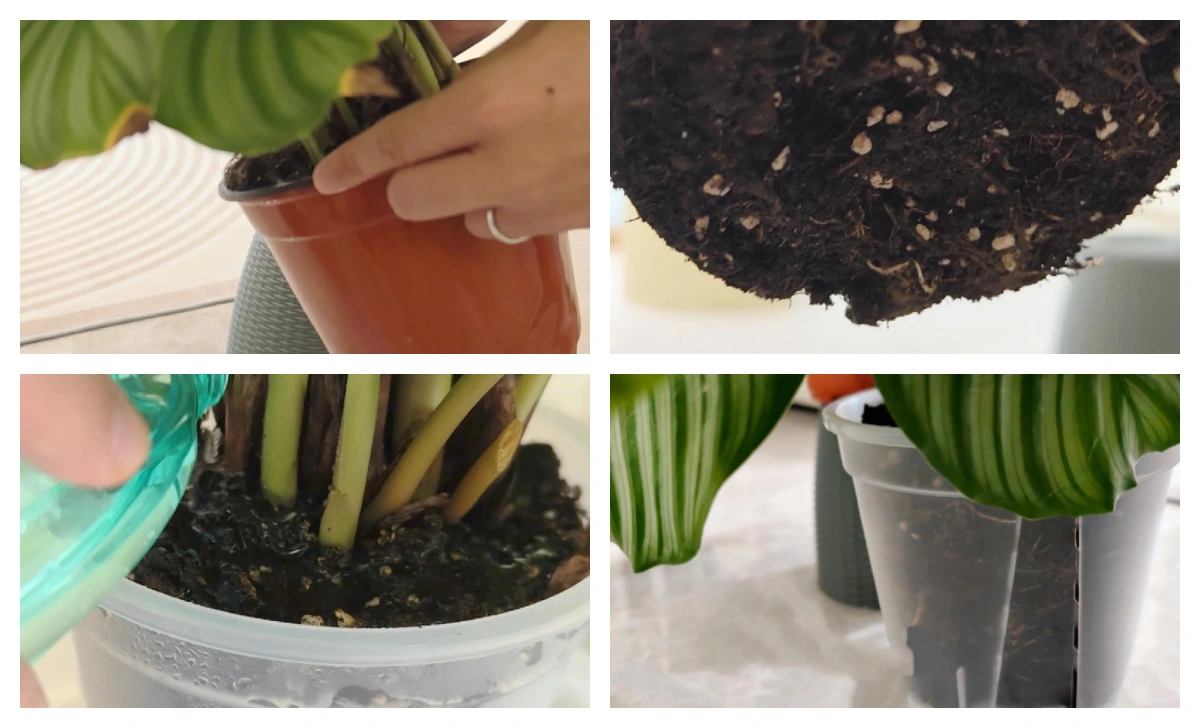
How to Repot Calathea Step by Step
I keep Calathea repotting gentle. The goal is not to strip the plant bare, but to refresh the root environment without causing unnecessary shock.
Step 1: Water Lightly if the Root Ball Is Too Dry
If the root ball is extremely dry, I water lightly a few hours before repotting. Bone-dry roots and soil can break apart too easily. I do not want the mix muddy, just slightly easier to handle.
Step 2: Slide the Plant Out Gently
I press the sides of the pot and slide the plant out carefully. I avoid pulling hard on the stems or leaf bases because Calathea roots can tear easily. Healthy roots are worth preserving.

Step 3: Check the Roots, But Do Not Over-Clean Them
I do not remove every bit of old soil unless the mix is rotten, sour-smelling, or pest-infested. Calathea roots are fine and sensitive, so I only loosen the outer layer and remove soil that falls away easily.

Step 4: Trim Only Dead or Rotten Roots
I trim roots that are black, mushy, hollow, or smelly with clean scissors. I leave firm white, cream, or light brown roots alone. Cutting healthy roots just adds more stress.
Step 5: Place It at the Same Depth
I set the plant at about the same depth it was growing before. I do not bury the crown too deeply, because covering the base with too much wet mix can invite rot.
Step 6: Fill Around the Root Ball Gently
I add fresh mix around the root ball and press lightly, just enough to hold the plant steady. I avoid packing the soil into a hard block. The roots still need small air spaces.
Step 7: Water Thoroughly and Let It Drain
After repotting, I water thoroughly once and let extra water drain out. If I am using a self-watering pot, I do not keep the reservoir full right away. I give the roots time to settle before exposing them to constant bottom moisture.

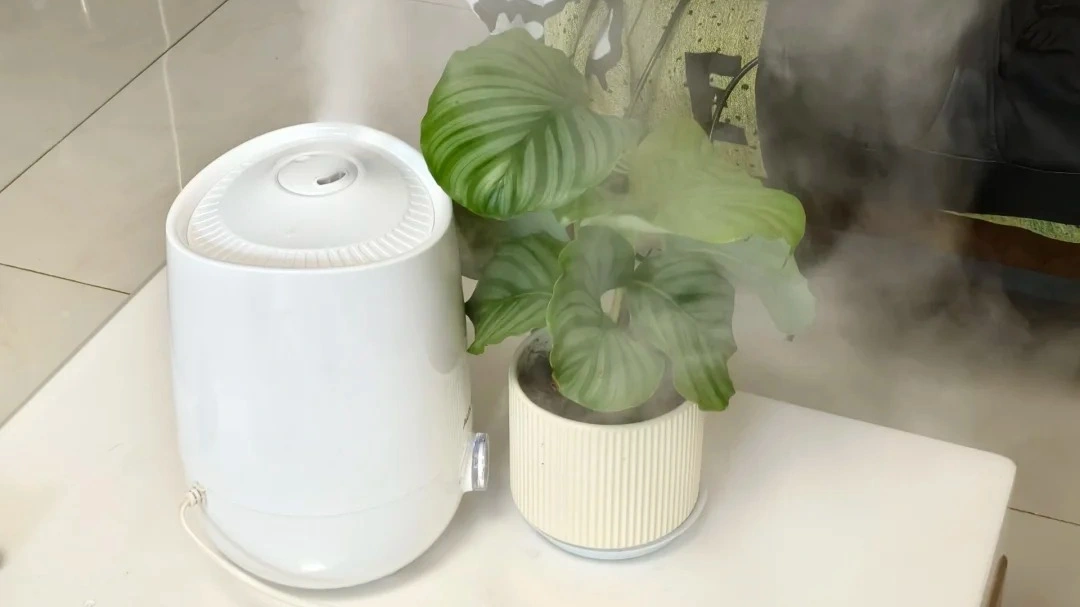
My Experience Switching to a Self-Watering Pot
I used to think the original nursery pot was probably fine because it looked breathable enough. But the plant kept giving me mixed signals: new leaves were growing, yet older leaves kept developing crispy edges. That made me suspect the issue was not simply “too little water.”

It felt more like a root-zone problem: uneven moisture, weak airflow, and a watering rhythm the plant could not settle into. The plant was not collapsing, but it never looked fully comfortable either.
After reading other growers’ experiences, I started paying more attention to airflow and the pot setup. I kept a small circulation fan running more often and moved the plant into a bottom-watering / self-watering style pot. The result was better than I expected. The plant grew more steadily, and watering became easier to control.
I do not think self-watering pots are automatically better for every Calathea. They work only if the soil is airy enough and the plant is not already sitting in a wet, suffocating mix. But for this plant, the combination of better airflow and a more even bottom-watered setup made a real difference.
Aftercare: What to Do After Repotting Calathea
After repotting, I try to keep the care simple. The roots have just been disturbed, so this is not the time to chase faster growth or keep changing the plant’s position.
Keep It in Bright Indirect Light
I keep the plant in bright indirect light after repotting. Direct sun can stress the leaves, but a dark corner can slow recovery. Soft, steady light helps the plant restart without forcing it too hard.
Keep Humidity Stable
Stable humidity helps, especially if the leaves look slightly limp or curled. But I avoid sealed, wet air with no airflow. A small humidifier is usually more reliable than heavy misting, because misting only wets the leaves for a short time. If you are not sure whether your room is dry enough to justify buying one, read my guide on whether Calatheas need a humidifier before adding another machine to the setup.
Do Not Fertilize Right Away
I do not fertilize immediately after repotting. I usually wait 3–4 weeks, or until the plant shows stable new growth. The roots need time to recover before handling extra nutrients. When the plant is settled again and showing stable new growth, I would only feed lightly. I explain what I use and when I would skip feeding in my guide to the best fertilizer for Calathea.
Do Not Keep Moving It
Repotting is already a major change. After that, I keep the plant in one calm spot instead of moving it around every day. Stable light, temperature, and humidity matter more than finding a perfect position immediately.
Common Repotting Problems
Calathea Drooping After Repotting
Mild drooping after repotting can be normal shock, especially if the roots were disturbed. I give the plant a few days in bright indirect light with stable humidity before assuming something is seriously wrong.
If the pot feels heavy and the leaves are still drooping, I would not water again right away. More water can make root stress worse.
Leaves Curling After Repotting
Curling after repotting can come from root disturbance, dry air, or a sudden change in moisture around the roots. Both very dry soil and overly wet soil can cause curled leaves, so I always check the pot before reacting.
If the mix is dry and light, I water carefully. If it is already moist, I focus on humidity, softer light, and letting the roots settle.
Yellow Leaves After Repotting
One or two older yellow leaves after repotting do not always worry me. Calatheas can shed older leaves after a change, especially if the root ball was disturbed.
Several yellow lower leaves while the pot stays wet is different. That pattern makes me check for root stress, poor drainage, or a pot that is too large for the root system.
Brown Edges After Repotting
Brown edges after repotting usually come from dry air, harsh water, unstable moisture while the roots recover, or exposure to a vent or direct sun. It does not always mean the plant needs more water.
I check placement first: no hot sun, no heater or AC airflow, and no cold window glass. Then I check whether the pot is drying normally and whether water quality may be part of the problem.
Quick Checklist Before You Repot
Before I repot a Calathea, I check whether the plant really needs it. This helps me avoid repotting out of panic.
| Question | Why It Matters |
|---|---|
| Is the plant actively growing? | Recovery is easier when the plant has enough warmth and light to restart root growth. |
| Is the soil compacted or slow to dry? | Repotting may help if the roots are sitting in a heavy, low-oxygen mix. |
| Are the roots crowded? | Roots circling tightly or growing out of drainage holes may mean the plant needs one size larger. |
| Is the plant already stressed? | A weak Calathea can look worse after repotting, so it may need recovery first. |
| Do I have an airy mix ready? | A new pot will not fix dense soil if the mix still stays soggy. |
| Can I provide stable aftercare? | Bright indirect light, steady humidity, and good airflow matter after repotting. |
If most answers point to soil or root-zone problems, repotting makes sense. If the issue is only one old yellow leaf, a dry room, or a temporary light change, I would fix the environment first.
Before buying supplies: I would choose the pot and soil together, not separately. A self-watering pot needs an airy mix, terracotta dries faster, and a dense store-bought mix may need extra bark or pumice before it works well for Calathea.
- Need a pot? See my Calathea pot guide.
- Need soil or amendments? See my store-bought Calathea soil guide.
The Real Goal Is a Better Root Environment
Repotting a Calathea is not about giving it the biggest or prettiest pot. It is about improving the root environment. If the old mix is compact, slow to dry, or no longer holding moisture evenly, a careful repot can make the plant easier to manage.
For me, the biggest improvement came from three things working together: a more controlled pot setup, better airflow, and a mix that did not stay heavy around the roots. The self-watering pot helped, but only because the soil and airflow supported it.
If I had to simplify the whole process, I would say this: repot gently, avoid oversized pots, keep the mix breathable, and give the plant calm aftercare. A Calathea usually recovers better from one thoughtful change than from several rushed fixes at once.
FAQ
Need Help With Watering, Light, or Soil Next?
Repotting only works well when the rest of the care setup makes sense. Visit the full Calathea Care hub for watering, light, soil, and common problem guides.
Start the Care Guide →