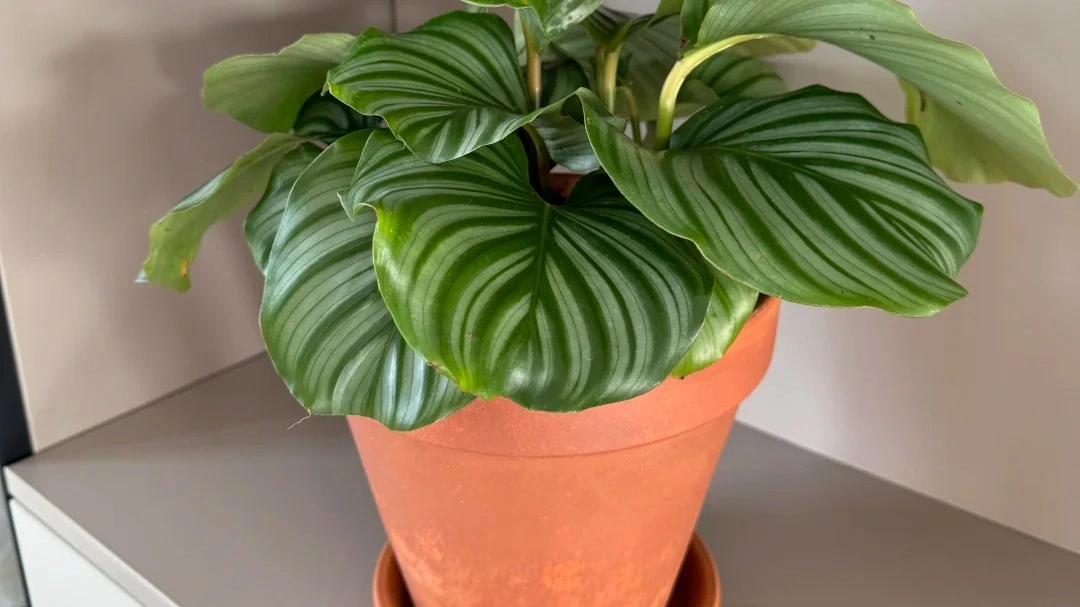
A while ago, I finally thought I had won. After weeks of monitoring and adjustments, the spider mite problem on my plants was under control. Then, almost immediately, something worse showed up on my Calatheas.
Tiny, elongated dark insects started appearing along the leaves. At first, I doubted myself. I had been actively watching for mites and fungus gnats, so this felt unfair—like missing a threat I didn’t even know I should be looking for. A quick search confirmed it: thrips. And unlike a one-off pest issue, thrips don’t announce themselves loudly. They spread quietly, damage new growth, and turn what looks like a healthy plant into a long-term recovery project.
What made this especially exhausting was realizing that thrips on Calathea aren’t a quick fix. This isn’t a “spray once and move on” situation. It’s a drawn-out process that tests your patience, your observation skills, and your willingness to adjust strategy over time.
This article isn’t a generic pest encyclopedia. It’s based on what I personally went through—how I identified thrips on Calathea, how I decided when to escalate treatment, and what actually worked for me after weeks (and months) of trial, failure, and recovery.
What Thrips Look Like on Calathea (And Why They’re Easy to Miss)
Thrips are one of those pests that don’t look alarming at first glance—especially on Calathea. They’re tiny, usually around 1–2 millimeters long, narrow and elongated rather than round. If you’re expecting something obvious like spider mites or aphids, thrips can slip right past your attention. If you’re still unsure whether you’re seeing thrips or something else, it helps to compare leaf damage patterns across common causes.
On Calathea, you’ll usually see different colors at different stages. The larvae are often pale yellow or off-white, blending almost perfectly with new growth and leaf veins. Adults are darker—ranging from brown to black—but still small enough to look like moving dust rather than insects.

Their behavior is what makes them especially hard to catch. Thrips avoid light and tend to hide along leaf folds, midribs, and the undersides of tender leaves. During the day, you may see nothing at all. Then, suddenly, damage appears as if overnight.

Calathea is a particularly easy target because of its soft, thin leaves and constantly emerging new growth. Thrips are attracted to fresh, nutrient-rich tissue, and Calathea produces exactly that. By the time you notice distorted or scarred leaves, the insects themselves may already be well hidden.
If you’re spotting tiny, elongated insects that seem to vanish when disturbed—and your Calathea’s newest leaves are suffering(especially new leaves curling)—there’s a strong chance you’re dealing with thrips, even if you don’t see many at once.
Damage Patterns: How Thrips Actually Harm Calathea Leaves
The damage thrips cause on Calathea often looks confusing at first because it doesn’t resemble classic pest holes or chew marks. Instead, the symptoms tend to appear as distorted growth, curling leaves, and irregular streaks or scars—which is why many people initially misdiagnose the problem.

The mechanism is specific and important to understand:
Thrips don’t chew leaves.
They use piercing mouthparts to break through the leaf’s outer epidermis and suck out the plant’s internal fluids. This sap loss doesn’t just remove nutrients—it disrupts how the leaf develops while it’s still forming.
On Calathea, this leads to a predictable chain reaction:
- Pierced epidermis → damaged surface cells
- Sap loss → uneven internal pressure within the leaf
- Interrupted development → curling, twisting, and misshapen blades

Because Calathea leaves unfurl gradually, any damage that happens early shows up later as long, silvery or brown streaks, warped edges, or sections that never fully flatten out. Once a leaf emerges damaged, it cannot self-correct, even if the pest pressure is later removed.

This is why thrips damage is often mistaken for underwatering or watering mistakes that cause curling and drooping, sun stress, or general care mistakes. The plant may be watered correctly and kept in proper light, yet new leaves still look wrong. The key difference is pattern: thrips damage follows the structure of the leaf as it grows, rather than appearing randomly or uniformly across the plant.
Understanding this cause-and-effect relationship is critical. Without it, it’s easy to keep adjusting watering or light—while the real problem continues quietly on the newest growth.
The Moment I Knew It Was Thrips (My First Real Confirmation)

The confirmation didn’t come from a care chart or a checklist—it came from a very specific moment of comparison.
I noticed thin, dark, elongated insects moving along the newest leaves of my Calathea. My first instinct was to suspect spider mites, since I had dealt with them before. But something didn’t line up. There was no webbing, even after close inspection under strong light, and the damage pattern didn’t match the speckled, dusty look mites usually leave behind.
I then considered fungus gnats. I had been actively preventing them, so the idea made sense at first. But these insects weren’t flying, hovering near the soil, or appearing when I watered. They were on the leaves themselves, moving quickly and slipping into folds and veins as soon as they were disturbed.
The final confirmation came when I checked the newest, still-unfurling leaves. Older leaves looked mostly intact, but fresh growth showed early distortion and faint linear scarring—damage that had clearly happened before the leaves fully opened. That ruled out mechanical damage and sunburn-related brown patches.
In that moment, the pattern clicked:
- not webbing (so not spider mites),
- not flying or soil-focused (so not fungus gnats),
- and not random damage (so not care-related).
What I was seeing matched thrips exactly—both in appearance and in how the damage showed up over time.
First Response Checklist: What I Did Immediately
Once I confirmed it was thrips, I resisted the urge to react impulsively. Panicking leads to over-treatment, and over-treatment often creates new problems. Instead, I followed a simple, deliberate checklist to keep the situation contained and assess how serious it really was.
1) Isolation
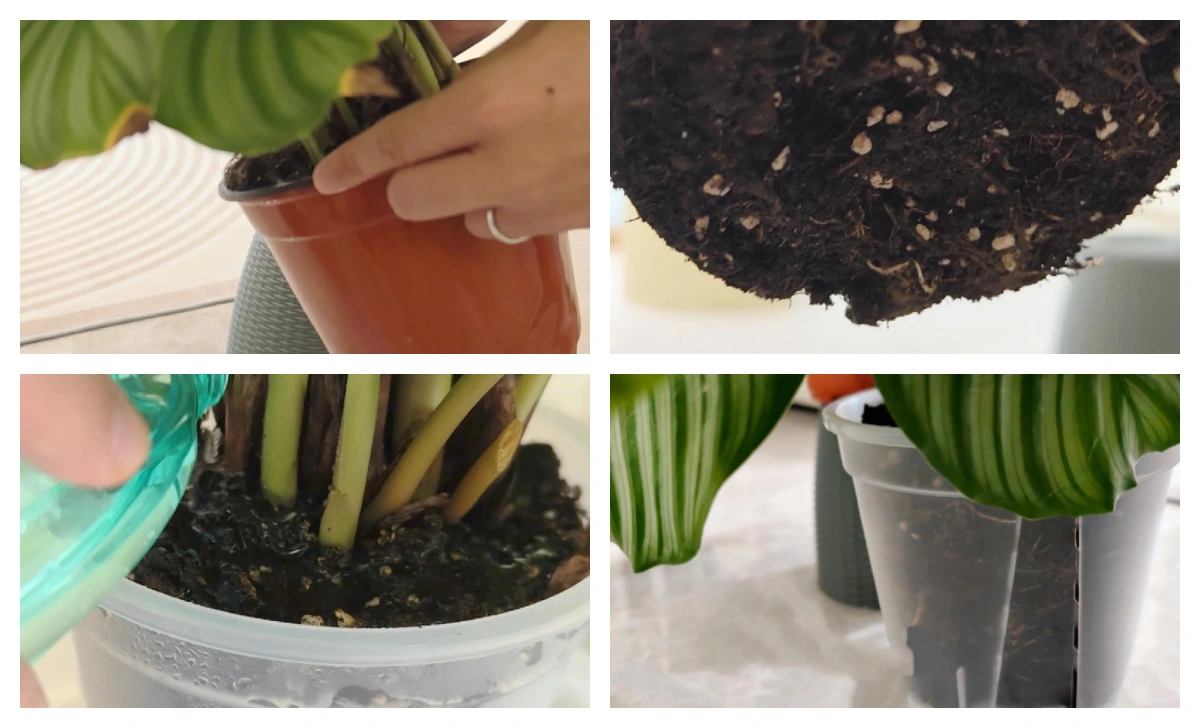
The first thing I did was separate the affected Calathea from every other plant. Thrips spread easily, and proximity matters. Even plants that looked fine were moved away if they had been nearby. Isolation wasn’t about treatment yet—it was about stopping the problem from multiplying.
2) Inspection
Next came a careful inspection. I checked both sides of the leaves, focusing on new growth, leaf folds, and the midrib where thrips like to hide. I wasn’t counting insects—I was looking for patterns: where damage appeared, which leaves were affected, and whether fresh growth showed early signs of distortion.
3) Severity assessment
Only after isolating and inspecting did I decide how serious the infestation was. I asked myself a few key questions:
- Was damage limited to one plant or several?
- Were only a few leaves affected, or was new growth already compromised?
- Did I see larvae as well as adults?
This step mattered most. A light, early-stage infestation requires a very different response than a widespread one. By slowing down and following this order, I avoided both underreacting and overreacting—and that set the tone for everything that followed.
My No-Pesticide Approach (What Actually Reduced the Population)
At the beginning, I deliberately avoided pesticides. Not because I think chemicals are always wrong, but because thrips infestations escalate easily when you treat blindly. I wanted to understand the scale of the problem first, avoid stressing already weakened Calathea leaves, and reduce unnecessary exposure—especially since I keep plants in a shared indoor space.
Instead of trying to “kill everything fast,” my goal was simpler: reduce population pressure and interrupt their life cycle.
Here’s what I relied on:
Targeted water spraying
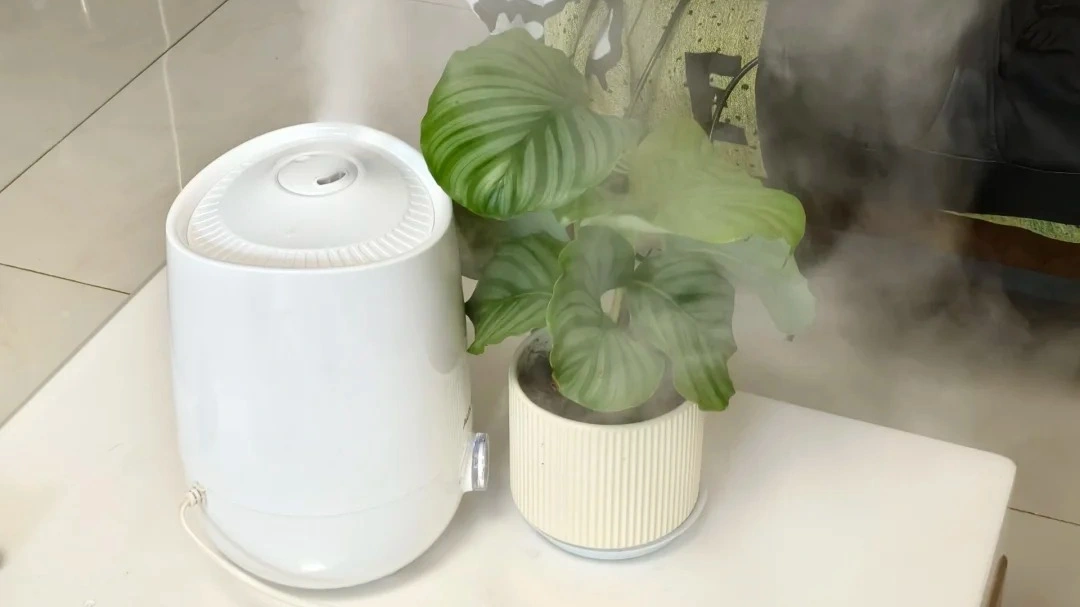
Thrips are active at night and hide during the day. I also tightened up my humidity because dry air made the leaves less resilient during recovery. Each evening, I used a spray bottle to thoroughly rinse new growth, focusing on both the top and underside of the leaves. This wasn’t a light misting—it was a deliberate wash to physically dislodge larvae and adults from tender tissue.
Manual removal
After spraying, I checked the leaves closely. Any remaining insects I could see were removed by hand using a damp cotton swab. It was slow and repetitive, but it made a measurable difference over time.

Simple deterrents, not cures
I also experimented with strong-smelling deterrents like diluted garlic water. I didn’t expect this to eliminate thrips, but it helped make the environment less favorable, especially on fresh growth.
What’s important to understand is this:
none of these methods worked overnight.
They didn’t “solve” the problem in a single application. What they did was gradually reduce numbers, protect new leaves from constant damage, and buy time to observe whether the infestation was stabilizing or getting worse. During treatment, I kept my Calatheas in gentle light to reduce stress.
This approach lowered pressure enough that new growth started to look healthier—but it only worked because it was applied consistently, every day, not because any single method was powerful on its own.
When Physical Methods Stop Working (Clear Escalation Line)
There comes a point where persistence alone isn’t enough. Knowing when physical methods have failed is just as important as knowing how to start them. This isn’t about giving up early—it’s about recognizing clear signals that the situation has crossed a threshold.
For me, physical control was no longer sufficient when I noticed one or more of the following failure signs:
- New leaves continued to emerge deformed, even after days of consistent washing and manual removal
- Larvae kept reappearing on fresh growth, suggesting the life cycle wasn’t being interrupted
- Multiple plants showed symptoms, despite strict isolation
- Damage progressed faster than my daily efforts could contain
These signals didn’t mean physical methods were “wrong.” They meant the infestation had reached a scale where population rebound outpaced removal.
What’s important here is restraint. This stage is not an automatic green light to reach for the strongest treatment available. It’s a decision point—a pause to reassess severity, spread, and risk. Escalation should be deliberate, not reactive.
There is no universal solution that works for every home, every plant, or every level of infestation. The mistake many people make is treating escalation as failure, when in reality it’s part of a graduated response. Physical methods are a filter. When they stop holding the line, it’s a signal to consider stronger tools—not to panic, and not to assume instant results.
Understanding this boundary kept me from cycling endlessly between hope and frustration. It clarified when observation needed to turn into intervention—and just as importantly, when not to rush that decision. If the plant is declining while the pot stays wet, I also check root rot symptoms, because stress stacks fast on Calathea.
About Chemical Control: What I Used — and Why This Is Not a Recommendation
Eventually, I did escalate—but carefully, and with clear boundaries around what I was (and wasn’t) trying to do.
What follows is a record of my personal experience, not a set of instructions and not a recommendation for others to copy. Chemical control comes with regional regulations, label restrictions, and household risks, especially if you live with pets. Those factors matter more than any single product choice.
I turned to chemical control only after physical methods failed to slow the infestation and new growth continued to emerge damaged. Even then, my goal wasn’t to “wipe everything out instantly,” but to interrupt the reproductive cycle that physical removal couldn’t fully break.
A few important clarifications:
- Products and active ingredients vary by country and label approval. What’s legal, available, or appropriate in one place may not be in another.
- Many systemic insecticides are explicitly restricted around pets. This was a major reason I hesitated and researched carefully before doing anything.
- I’m not sharing exact recipes, ratios, or step-by-step instructions here. Those details belong on product labels and with local guidance—not in a blog post.
The only reason I’m including this section at all is transparency. Omitting the fact that I eventually escalated would create a misleading impression that physical methods always work if you’re patient enough. They often help—but not always.
If you reach this point, the most responsible next step is reading labels closely, understanding household risks, and choosing the lowest effective intervention, rather than chasing a “stronger” solution. Escalation isn’t about force—it’s about control, timing, and minimizing collateral damage.
This stage marked a shift in mindset for me: from daily containment to long-term prevention. And that distinction mattered far more than the specific product involved.
My 4-Month Thrips Management Framework (Isolation, Rotation, Recovery)
What finally stopped this from becoming a recurring nightmare wasn’t a single treatment—it was changing how I managed plants over time. Thrips aren’t just a pest problem; they’re a systems problem. If your setup allows them to move, hide, and rebound, they will.
Over four months, I settled into a framework that focused less on “killing thrips” and more on controlling exposure, timing, and recovery.
1) Isolation: break the movement chain
Any plant that showed clear feeding damage, distorted new growth, or visible insects was immediately removed from the main plant area. This wasn’t optional. Thrips spread quietly, and visual health alone isn’t a reliable indicator.
I treated isolation as a containment zone, not a punishment. Plants stayed there until I could confidently say the pressure had dropped—not until they “looked better for a day or two.”
2) Observation period: slow down the decision-making
Every isolated plant went through a deliberate observation window. During this time, I wasn’t trying new methods constantly. I watched for:
- Whether new leaves emerged clean or damaged
- Whether insects reappeared after several days
- Whether symptoms stabilized or escalated
This step mattered because thrips operate on cycles. Reacting too quickly resets your ability to read what’s actually happening.
3) Rotation logic: avoid repeating the same failure
If a method—physical or chemical—reduced pressure but didn’t stop reinfestation, I didn’t repeat it indefinitely. Thrips adapt. Repeating the same approach without reassessment only creates resistance or false confidence.
Rotation wasn’t aggressive; it was intentional. Each change was based on observed outcomes, not frustration.
4) Recovery standards: define what “safe” actually means
A plant wasn’t cleared to return to the main group just because insects weren’t visible. My recovery standard was stricter:
- Multiple new leaves emerged without distortion
- No insects observed across repeated inspections
- Overall growth resumed at a normal pace
Only then did a plant move out of isolation—and even then, it stayed under closer watch.
What this framework gave me wasn’t perfection. It gave me control. Instead of cycling endlessly between outbreaks and treatments, I finally understood why reinfestation kept happening—and how to interrupt it.
Thrips don’t disappear because you try harder. They disappear when your system no longer works in their favor.
FAQ
This is why surface treatments alone often fail, and why infestations can reappear even when leaves look clean.
Eggs and pupae are protected inside plant tissue or soil, so population rebounds often happen weeks later unless the environment and follow-up strategy are adjusted.
Calathea’s tender new growth makes early infestations easier to miss—and easier for thrips to establish.
This early feeding is a common cause of twisted or permanently distorted new leaves.
Without direct removal or intervention, the population usually stabilizes rather than disappears.
Early isolation is one of the most effective ways to prevent a single infected Calathea from becoming a multi-plant problem.
Still worried about your plant?
👉 For more tips on keeping your plant healthy, explore our Complete Calathea Care Guide.
Explore All Problems →